Entra ID/Azure AD On-Premises
Follow the below instructions to integrate your on premises Smartsign server with Entra ID.
Azure AD has been rebranded by Microsoft to "Entra ID". This has no effect on the integration. (https://www.microsoft.com/en-us/security/business/identity-access/microsoft-entra-id)
Server requirements
- Smartsign Server version 10.20.10 or higher.
- Server must be configured to use SSL/TLS (https).
Licensing
Using Entra ID integration requires a valid Support- and Upgrades agreement (SMSUP) for all licenses.
Setup overview
- Register an app in your Entra ID to enable authentication and access to relevant data
- Map Entra groups to relevant sites and user profiles in Smartsign
- Configure and Enable Entra ID authentication in Smartsign Server (Smartsign Identity)
- Configure auto-provisioning for users from your Entra ID tenant (Optional)
- Map Entra groups to Smartsign groups to control resource permissions (screens, media etc) from Entra (Optional)
Register an app in Entra ID to enable authentication
Microsoft 365/Entra administrator access required
-
Go to https://entra.microsoft.com/ and login with an admin user
-
Click App registrations
-
Click New registration
-
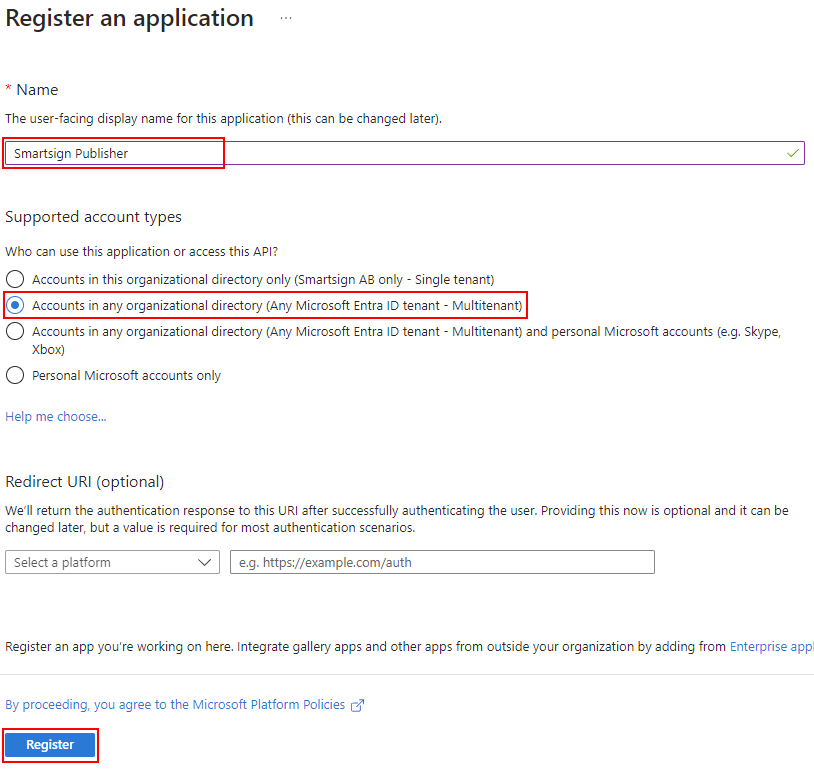
Enter a suitable name for the app. for example "Smartsign Publisher - MyCompany". For Supported account types, select "Accounts in any organizational directory (Any Microsoft Entra ID tenant - Multitenant)". (Single tenant no longer supports using the common Microsoft login endpoint). Complete the task by clicking Register.
-
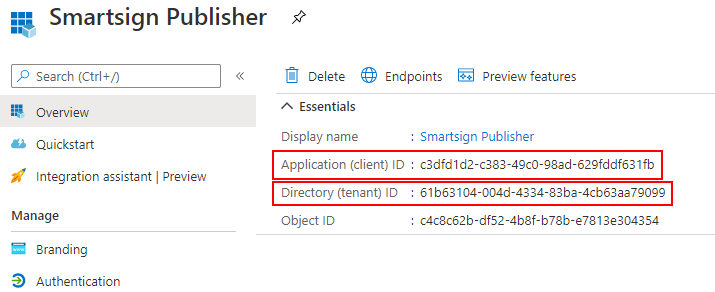
The app will now be created. Please make a note of the Application (client) ID and Directory (tenant) ID. You will need them later.
-
click Authentication
-
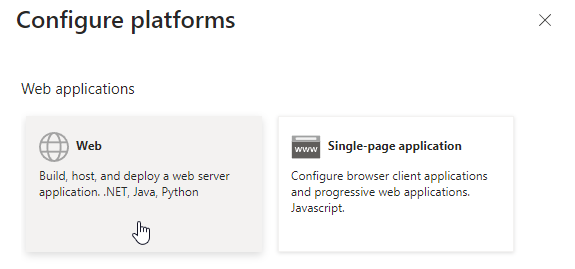
Click Add a platform and select Web
-
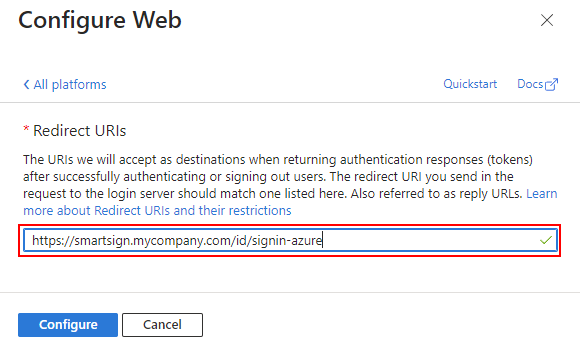
Provide the https URI to your server + "/id/signin-azure" and click Configure
Example:https://smartsign.mycompany.com/id/signin-azure
-
Click Certificates & secrets

-
Select the Client secrets tab
-
Click New client secret
-
Provide a description and select when it should expire, typically 24 months (max possible). Then click Add.
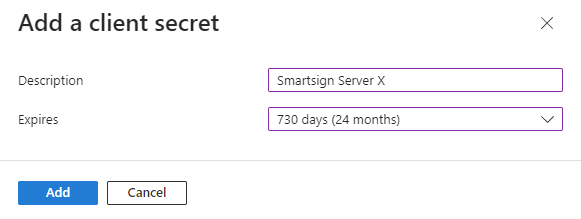
-
The secret will be created and shown in the list of client secrets.
IMPORTANT! Make a note of the secret Value right away. You will not be able to access it again.

-
Click API permissions
-
Click Add a permission
-
Select Microsoft Graph
-
Select Delegated permissions
-
You can type in the search field to find permissions. You'll need to add the following permissions.
Delegated Permission Used for Admin consent required User.Read Read user details No GroupMember.Read.All Read which groups the user is a member of Yes 

Check each permission and click Add permissions to add them. -
With the permissions added, click Grant admin consent for <your company> and then confirm.
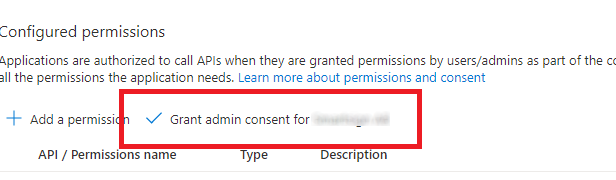
** -
Verify all permissions are green.
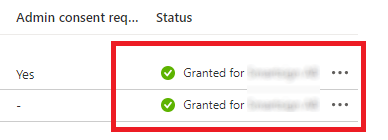
-
Click Token configuration

-
Click Add groups claim, select Groups assigned to the application, ID: Group ID and Access: Group ID. Then click Save.
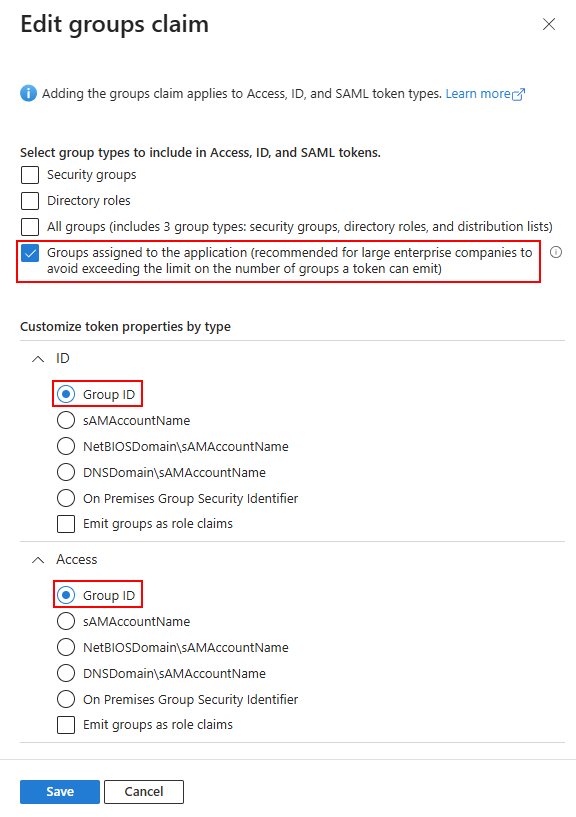 note
noteIf you have a small Entra directory it is possible to use Security groups instead of Groups assigned to the application, but we don't recommend it. Due to the larger group payloads it is often unreliable.
-
Click Branding and configure branding to improve usability (optional)
-
Done!
Enable Entra ID authentication for Smartsign Server
- On the server, find Smartsign Server Installer - Advanced Settings in the start menu and launch it
- Input the Application (client) ID of your App and the Client secret value
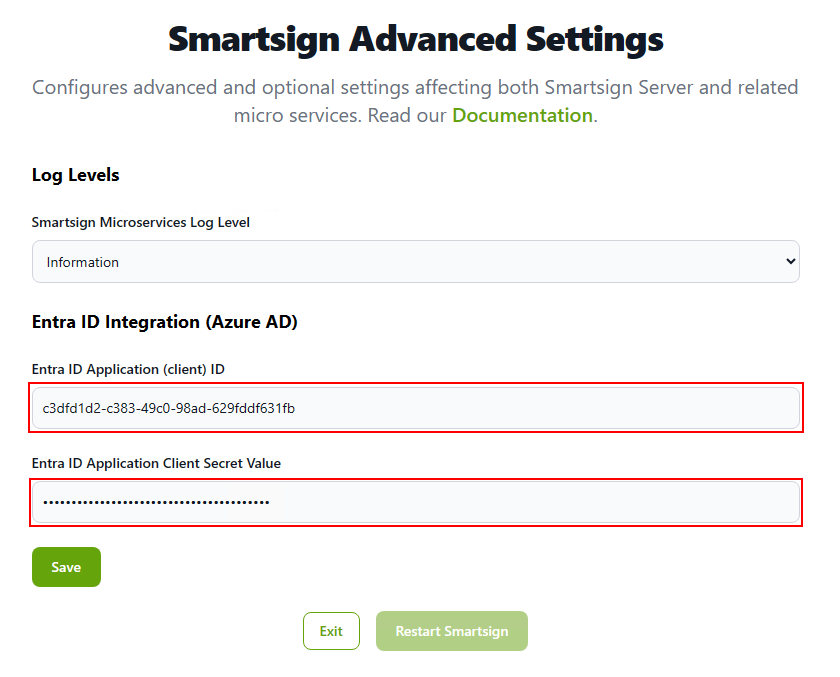
- Save the settings
- Smartsign needs to be restarted for the settings to apply. You can do so directly from the Server Installer by clicking Restart Smartsign
- Wait until Smartsign is up and running again
- Login to Smartsign Publisher with an Admin account
- Open Management → System → System settings
- Select the Azure AD settings category
- Configure the settings as follows. Provide the Application (client)
ID that you received when you registered your App
Setting Value Description App client id <string> The Application (client) ID of the app that you registered. This is set automatically when you configure it in Server Installer.
Example: "c3dfd1d2-c383-49c0-98ad-629fddf631fb"
Self registration True/False True: Authenticated users are automatically registered and linked in Smartsign (recommended)
False: Users must manually link an existing Smartsign user to their Entra ID credential
Enable Azure AD True/False Enables or disables Entra ID/Azure AD integration Sync sites from identity provider True/False True: Site access will be synchronized with Entra every login (recommended)
False: Site access will only be synchronized the first time a new user signs in (at self registration)
- Click Save, Entra integration is now enabled and will appear as an option on the login page.
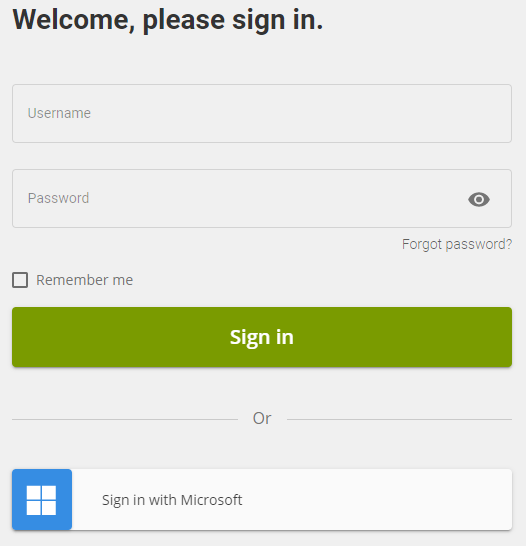
- Done, Entra ID authentication is now enabled
Configure access for auto-provisioning (optional)
-
If you want to use auto-provisioning, we now need to determine which users should be allowed to sign in using Entra and have their users created automatically.
If you haven't already, please prepare the necessary Entra security groups in accordance with the Planning section.
For this example we will use the following example groups:Group name Group Object ID Smartsign-Site-MyCompany ede896aa-63e1-4330-9846-63859c833053 Smartsign-Permissions-Publisher 9ea0302d-d0f9-4433-8cd3-30fc867dce30 Smartsign-Permissions-SiteAdmin 449f95f9-8e48-43ec-a16e-65ec9117a180 -
Assign all related groups to your Smartsign Entra App.
-
As an Admin, in Publisher, go to Management → Sites and view the site that you wish to configure.
-
Provide the ID's for the Entra Tenant (from the app registration) and the Entra group object that gives access to the site in question. Then click Save.
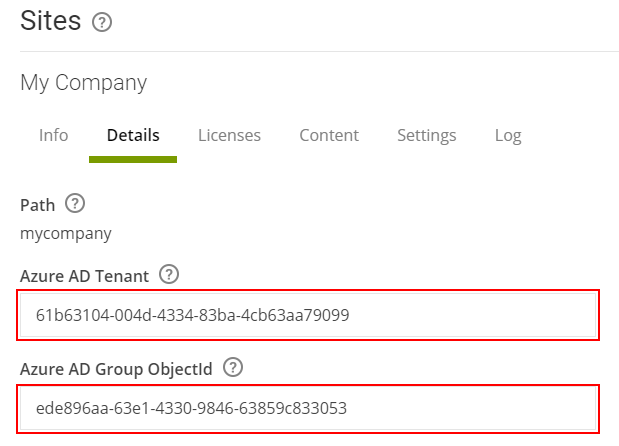
-
Go to Management → Users → User profiles and view each user profile that you want to use with Entra. Connect it to the relevant Entra group by providing the Entra group object ID. Then click Save.
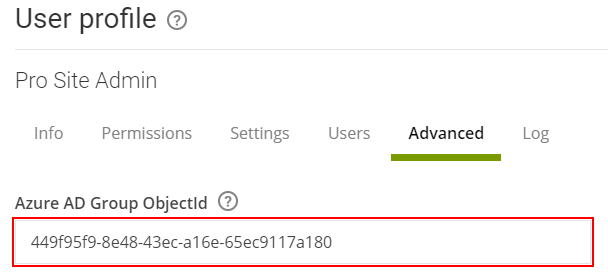
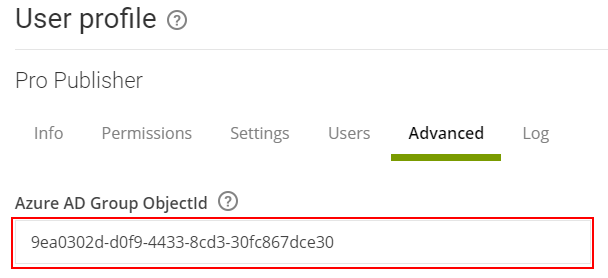
-
Users with the relevant groups should now be able to login using their Entra credentials.
-
Done!
Manage resource access using Entra ID (optional)
Access Groups are used to control access to resources, such as screens,
media library folders etc, for all non-admin users.
These can either be managed directly in Smartsign or mapped to Entra
ID groups to control resource access from Entra.
- Create or identify the Entra security groups to use for access control in Smartsign.
- Assign all related groups to your Smartsign Entra App.
- Find and note the Entra Group Object ID for each.
- Create the corresponding groups in Smartsign and input the Entra Group Object ID to connect each to its Entra group.
- Assign which resources each group should provide access to
- Done! Users will be automatically added/removed from the groups each login, based on the Entra group memberships.